{Another gem from guest contributor, Sara. She’s like a design fairy — everything she touches turns out cool. In this installment, she creates a simple, yet very personalized, un-corkboard bulletin board. ~Amy}
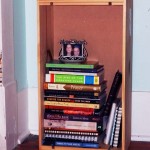
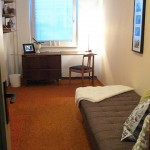
 For a while now, I’ve needed more space on my walls surrounding my desk for notes, inspirations, and photos that have been piled up for ages. I had a lovely Decoder Ring print hanging in the space above my desk since I moved into my house, but I recently acquired a much-needed drafting lamp that covered about half of the print, so it officially became time to move the artwork and create a practical, yet visually appealing version of a bulletin board. Corkboards are great, but I wanted something that would add a bit of color and would fit well into the wall space left by my monstrous lamp.
I decided to create a series of panels out of paper that would allow me to attach items to it via paperclips.
Here’s what you’ll need:
1. Thick paper (watercolor or cardstock)
2. Watercolors, paints, markers, etc (optional)
3. Exacto knife and cutting board (optional)
4. Flat push pins
5. Jumbo paper clips
6. Your photos, notes, postcards, magazine clippings, etc – whatever you need to post on your wall!
 First, I painted a plaid pattern with watercolors. I knew I was going to cut the paper into strips, and most of the paper would be hidden with my notes and pictures, so I didn’t worry too much about what it looked like. I just wanted pops of color. You could also buy colored cardstock or color thick paper with markers or map pencils – it’s completely up to you!
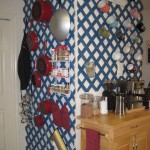
After the paper dried, cut the paper lengthwise into 8 strips. I made 4 rows on my wall connecting 2 strips to give it a bit more length.
 I bought flat, white pushpins to mount it to the wall. I also found some jumbo paper clips at the grocery store (these were seriously the biggest paper clips I’ve ever seen!). I thought the oversized clips added a bit of visual interest up close, and are so thin that they almost go unnoticed from a distance. They also don’t seem to bend the photos (or put holes in them like those pesky push pins!). I also used an exacto knife to cut some of my clippings, because I can never cut straight with the scissors.
 I then hung my photos, magazine clippings and (in my case) some vintage typography to the paper panels. I liked that the vintage type clippings added some consistency to the “bulletin board” so it didn’t look like an overwhelming mish mash of unrelated items. This is just a suggestion, and I say make it as mish-mashed as you like.
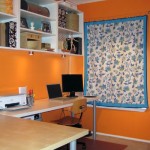
 The final product created a clothesline effect on the wall. I think it works well with the space, and finally gives me a place to display important items that were piled up on my desk. The pictures and papers are also easy to change out, adding to the functionality. Hooray for an organizational victory!
 I'm Amy Hadley. On HNWN! I give ideas and inspiration for organizing, decorating and homemaking. It's your home. You should love it.
  Vintage Aprons
 Modern Bathroom Mural
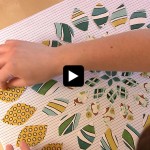 Fabric Flower Collage
 Polishing Pumpkins
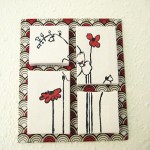 Tiny Art
 Cardboard Taxidermy
 Adding Storage: Clothes rack
 Handmade Christmas Gifts
 Christmas Tablescapes
 Sweet Pillowcase Nothings
6 Comments
I am SO inspired! I am totally doing this at my house! Go, Sari!!!
i love it! i want to do this at my office!
oooo, you should and take pics! I want to see!
I love it this idea! I also love how you edited your photos to illustrate it. Very eye-catching.
Thanks! From the suggestion of a friend, I went for an antiqued look with the pics! Thanks for reading!
I love this website!! Amy, you are doing a fantastic job!!