 A few years ago I learned how to make these nifty coasters for a fraction of what manufactured ones cost. They can also be used under a plant or vase of flowers, and grouped together can serve as a trivet! Ah, don’t you just love things that are multi-functional! And they are easy. AND they are great little gifts…birthday, thank you, hostess, you get the idea.

Supplies:
- Tumbled Marble tiles
- Bumpers
- Rubbing Alcohol
- Clean old wash cloth
- Clear Spray
Just go to the home & garden store (I like Lowe’s) and pick up the tumbled marble tiles and bumpers (and clear spray, if you don’t have any). Be sure you have some rubbing alcohol, or get that, too. I spent on $3.98 on the tiles (9, which means you will end up with 2 sets of 4 and one left over) but the bumpers are the expense…$9.92 for the little buggers. Don’t get the felt kind, get the clear rubber – they grip better and are water-proof. Maybe you can find them at Dollar General or Wal-Mart a little cheaper.
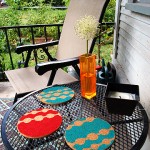
The weather was so nice I took my project outside and enjoyed robins hopping around while I crafted. Have a glass of iced tea! (It was too early for a margarita.)
Pour a little rubbing alcohol on a tile and wipe clean (this removes the dust), do this two times on both sides of each tile. Let dry thoroughly. (I talked on the phone with a friend and sipped my iced tea while the robins kept hopping through the flowerbed.) Sometimes I get out the stamp pad and a large stamp, and stamp a design on the tiles, but this time I opted for the plain and simple look. Or you can paint a little design.
After your embellishment has dried, apply the bumpers on the bottoms. Place a bumper near each of the four corners and stick one in the middle. Don’t ask me why I put one in the middle, I just do it to distribute weight (AND because I like the number 5). Apply a very light coat of clear spray on the topside. And you’re done!
For gift giving I stack 4 coasters and tie up with raffia or ribbon and slip it into a small gift bag
P.S. I told Amy recently that I am going to try to avoid doing another post about spray painting something…but the darned stuff snuck in anyway. I can’t help it! I LOVE paint in a can!!!
{Note from Amy: Mom introduced me to this project a few years ago, and I’ve had a stack in my gift closet every since. They’re a great go-to for a last-minute present, and always a hit! And heed the rubber bumper advice… with felt the coasters stick to wet glasses, and falling stone tiles are a bad thing.}
 I'm Amy Hadley. On HNWN! I give ideas and inspiration for organizing, decorating and homemaking. It's your home. You should love it.
  Vintage Aprons
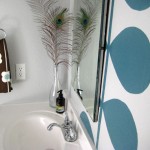 Modern Bathroom Mural
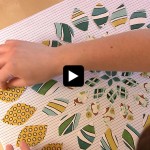 Fabric Flower Collage
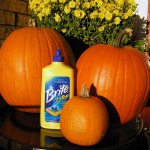 Polishing Pumpkins
 Tiny Art
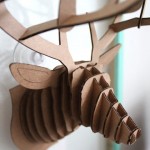 Cardboard Taxidermy
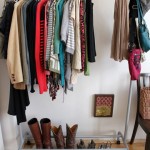 Adding Storage: Clothes rack
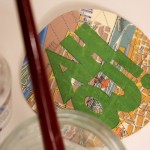 Handmade Christmas Gifts
 Christmas Tablescapes
 Sweet Pillowcase Nothings
One Comment
Thanks for the tip, I went an extra step and added a print on top of the coaster