{Fun with paint! This easy screen-printing method is all the fun of playing with screens and paint, but none of the confusion. Brought to you by guest contributor, Sara. ~Amy}
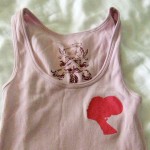
 I’ve always loved the idea of screen printing, but the machinery and expensive emulsions have kept me at bay. However, when one of my very crafty roommates, Sarah, introduced me to a simpler way of screen printing, I couldn’t help but give it a try! I’ve been really pleased with the results and now I’m more inclined to screen print a gift rather than buy something at the store. My most recent screen prints are pictured above. The Austin, TX screen was made by Sarah (she took an antique stamp and increased the size on a photocopier) and I made the bird screen from a freehand drawing.
What you need:
- A wooden or plastic needlepoint hoop
- Mod podge
- A semi-porous fabric like chiffon
- Sponge brushes and a very thin paint brush
- Screen printing paint
- An image to print (for this technique, it works better if it doesn’t have a lot of detail)
- A piece of cardboard big enough for your image to fit
- Clothespins
- A shirt, bag, pants, shoes, clutch, whatever you want to screen print!
How it goes:
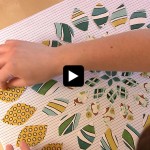
- Start with drawing or photocopying a simple image that you want to print.

- Place the image underneath the fabric and trace it with a pencil.
- Place your fabric in the hoop.

- Mod podge around the traced image. Make sure everything that you don’t want printed is covered with a thick layer of mod-podge. You don’t want the paint to seep through the holes in the fabric.

- Let the mod podge dry completely. After its dry, you are ready to screen print!
- Place your cardboard underneath your fabric, pull tightly over the cardboard and secure with clothespins. If you’re printing on a shirt, make sure the cardboard goes inside the shirt to prevent bleeding onto the back of the shirt. *Note: I recommend testing your screen on a piece of junk fabric before you print on your “final product” material. I made some revisions on my bird after the first test.
- Place the screen on top of the fabric. Hold securely with one hand and paint with the other. Make sure that you make blotting movements with the brush, not painting strokes. Its easy for the paint to slip underneath the mod podge and produce unclear edges. Use as much paint as you desire. If you want a “worn” look, don’t use as much paint, but if you’d like your image crisp, make sure and fill in every part of the image. Pay close attention to the edges and make sure you have painted them thoroughly, as this will create clear edges.
- When you are satisfied with the amount of paint, lift the screen directly up off the material.
- Let the material dry and then go over the screenprinted image with an iron to seal it in (its good to put a dishtowel in between the image and the iron).
It may take a few tries to produce the results you’re looking for, but keep experimenting and creating new prints. It’s super rewarding and lots of fun!
 I'm Amy Hadley. On HNWN! I give ideas and inspiration for organizing, decorating and homemaking. It's your home. You should love it.
  Vintage Aprons
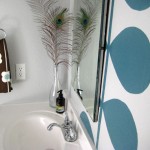 Modern Bathroom Mural
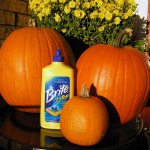 Polishing Pumpkins
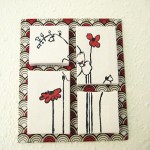 Tiny Art
 Cardboard Taxidermy
 Adding Storage: Clothes rack
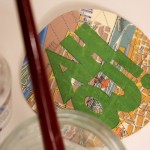 Handmade Christmas Gifts
 Christmas Tablescapes
 Sweet Pillowcase Nothings
6 Comments
genius! i can’t wait to try this technique out. and i already have the project in mind. thanks for sharing!
I’m so glad you’re inspired! Let me know how it turns out!
Make sure you try freezer paper stenciling, too! It’s probably even easier than this method, except you can’t reuse the stencils – that’s the trade off.
I’ve never heard of that method – I’ll have to look into it! Thanks for the tip!
Step 1: Buy freezer paper from the grocery store.
Step 2: Draw design on the paper-like side.
Step 3: Cut out design with X-acto.
Step 4: Iron onto fabric paper-side-up.
Step 5: Paint.
Step 6: Peel off freezer paper. Voila!
http://www.neitherhipnorfunky.com/?p=106
Another great idea! So clever. I bet once you have your basic materials, it’s really cheap to screen print a gift. I’m gonna bet Laura and her friends try this. They have craft night all the time!